


How to: Fit in Power Components into the Fixed Tilt Surface 15º mount
![]()

Our Fixed Tilt Surface Mount is unique in that it is:
- Fixed at a 15° angle
- ADA (Americans with Disabilities Act) compliant when combined with any VidaMount VESA tablet enclosure
- mountable on any desk, counter top or surface and allows for unique powering options.
This versatile VESA mount can be installed over a GFCI (ground-fault circuit interrupter), single or duplex, decora or non-decora wall outlet. That also gives this mount the ability to use the charging components given with tablet at the time of purchase. However there will be some configuring involved.
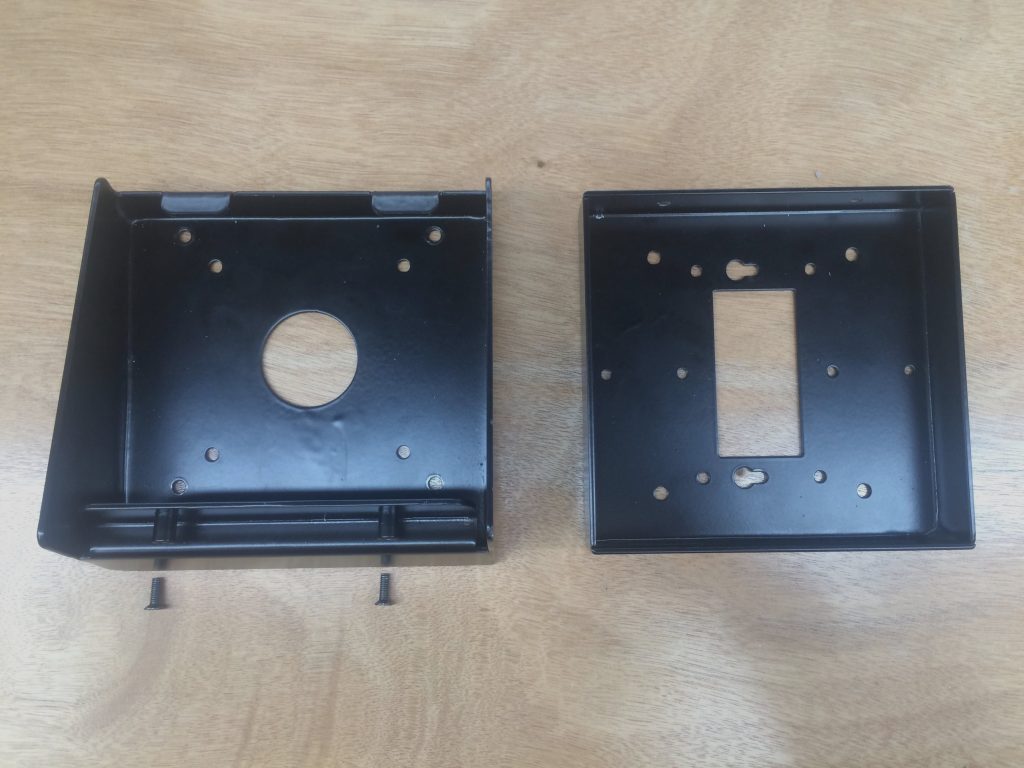
Assemble the VESA Plate and the Wall Plate
Before we assemble the two pieces of the mount together, we need to make sure that the charging components are placed within the tilt 15° mount face correctly. If this does not happen, the mount will not fit together. If the mount is able to screw together, the cables fit.
This means that the VESA enclosure is secured, all cords have been plugged in and the tilted face of the mount is screwed into the Vesa Enclosure. The tilt 15° mount is ready for the Wall and matching VESA plate to be assembled together. The power cables need to be positioned inside the VESA piece in such a way to allow the (2) brackets to come together & be secured, using the bottom screws.
Configuring / Layout of Charging + Power Components - by Brand
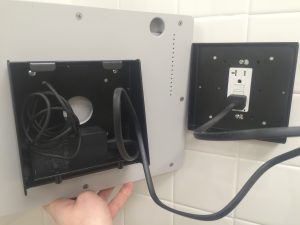
Apple iPad mounts: Plug the iPad AC adapter into the black extension cable provided. Next tuck the connected Apple AC adapter and extension cable female end into the bottom pocket of the tilt 15° mount like below. The tilt 15° mount will be tightly fitted closed until the bottom screws are fully tightened.

Samsung Galaxy Tab mounts: Plug the Samsung AC adapter into the black extension cable provided. Next tuck the connected Samsung adapter and extension cable female end into the bottom pocket of the tilt 15° mount with the usb connection pointing upwards like below. The titling mount will be tightly fitted closed until the bottom screws are fully tightened.

Microsoft Surface Tablet mounts:
- Surface 3 / Go / Go 2 – Because of the AC adapter that comes with the Surface 3, Surface Go & Go 2, there is no special layout / configuration required. Just plug into the wall, secure the mount together and install.
- Surface Pro (2017) / Pro 4 – This is slightly more complex depending on which AC Adapter we are using. The AC adapter which comes with the Surface Pro (2017) / Pro 4 is thin enough to fit into the wire pocket at the bottom of the tilted piece.

If the AC adapter is not fitting, it would be best to remove the VESA pan head screws (as shown). This will allow additional space for the larger AC adapter to slip into the pocket, flush against the surface. With the AC Adapter flat up against the pocket, there should be enough room.

Removing one screw is required to properly fit the larger Surface Pro (2017) power adapter - but is also perfectly safe. To fully secure these pieces, only (3) fixed points of contact are needed:
A) The first screw anchors the first contact position. Since only 1 screw is used, the mount and enclosure could still swivel with respect to each other.
B) The second screw anchors the same horizontal plane that the screws share. However, axial rotation about the (2) fixed points is still possible
C) A third & final screw secures and affixes all parts together - the VESA mount and the enclosure do not move with respect to each other.
D) The forth and final screw can be optionally installed, but it is not "REQUIRED" - think of this last screw as a “safety” or “back up”


