


How to Set Up iPad Kiosk Mode:
A Step-by-Step Guide
Sep 10, 2024 - by Nick CaracappaiPad Kiosk Mode is a powerful feature that transforms an iPad into a dedicated device for a single application, enhancing both security and user experience. This mode is particularly beneficial in various professional settings, including retail, education, and hospitality, where controlled access to specific functionalities is crucial.
This guide provides a comprehensive, step-by-step approach to setting up iPad Kiosk Mode, ensuring optimal configuration for seamless operation.
[Pro-tip] Watch how to setup Guided Access in our 1-minute video!
iPad Kiosk Mode Setups
There are two primary ways to implement iPad Kiosk Mode:- Guided Access
- Single App Mode
Guided Access
Guided Access is a simple kiosk mode for those who need to lock their iPad to a single app without a complicated setup process. It is ideal for individuals, small businesses, and temporary setups such as kiosks for trade shows.Admins and knowledgeable users can turn this iPad Kiosk Mode on and off with a passcode. This makes it a very flexible solution, but this flexibility can compromise security. This is unacceptable for bigger businesses and institutions but okay for smaller setups.
Guided Access is designed to help users focus by restricting the iPad to a single application and preventing access to other apps. It also allows administrators to disable hardware buttons, such as the Home, volume, and sleep/wake buttons, if necessary.
Touch input can be restricted to specific screen areas to avoid accidental touches or to guide user interaction to particular parts of an app.
Additionally, Guided Access allows setting time limits for app usage, making it useful for managing screen time or ensuring fair usage in shared environments.
Single App Mode
Single App Mode is a stricter iPad Kiosk Mode, but it requires a more complex setup process that usually requires a Mobile Device Management (MDM) solution. It is ideal for permanent setups, such as educational settings, healthcare facilities, and retail kiosks.Unlike Guided Access, knowledgeable users can’t exit the app unless the admin allows it. The tight security makes it the perfect iPad kiosk mode for business and enterprise settings.
Single App Mode primarily locks the iPad into one specific application, preventing users from switching to other apps, accessing the home screen, or using multitasking features. This absolute lockdown enhances the device's security, which is particularly beneficial in public or semi-public environments where there is a higher risk of unauthorized access.
Additionally, it allows administrators to control the user experience by ensuring the iPad is used solely for its intended purpose, improving efficiency and reducing the chances of user error.
Versatility of iPad Kiosk Mode: Kiosk Mode can streamline the operations of different businesses. For example, you can use Kiosk Mode to create self-service kiosks for retail, patient check-ins for healthcare, learning stations for educational institutions, and much more.
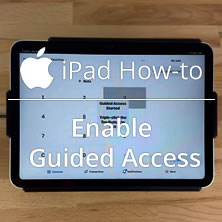
How to Set Up and Enable Guided Access Kiosk Mode

- Locks the tablet securely while allowing for easy removal.
- Mount to US, EU, or international gang boxes.
- Hidden 24/7 USB charging for a clutter-free look.
- Combines rugged protection with a sleek aesthetic.

- Easily tilt the tablet upwards or downwards for optimal visibility.
- Single locking screw secures the tablet with easy access.
- Hide power cables neatly for continuous, discreet charging.
- Choose a covered or exposed home button and camera.

- Optimal 15° kiosk tilt – Perfect for comfortable touchscreen interaction.
- Mount on US/EU gang box, GFCI outlet, or drywall.
- Space to hide power components, including adapters and cables.
- Fits existing electrical boxes for hassle-free installation.
Step 1: Accessing Settings
Open the Settings app on your iPad.Next, navigate to Accessibility. This can be found under the General section in older iOS versions or directly from the main menu in newer versions.
Step 2: Enabling Guided Access
Scroll down to the Guided Access mode option and tap on it.Toggle the switch to turn on Guided Access.
Step 3: Configuring Passcode Settings
Tap on Passcode Settings within the Guided Access menu.Select Set Guided Access Passcode and enter your chosen passcode. This passcode will be required to end a Guided Access mode session.
Depending on the iPad model, you can enable Face ID or Touch ID to end the session.
Step 4: Starting a Guided Access Session
Open the app you wish to use in Guided Access mode.Triple-click the Home button or the Top button to start Guided Access.
Tap Start to begin the Guided Access mode session.
Step 5: Adjusting Guided Access Settings
During a Guided Access mode session, you can adjust settings by triple-clicking the Home or Top button and entering your passcode.Options include enabling or disabling touch, motion, keyboards, and time limits.
You now have Guided Access set up, a reliable kiosk solution for your Apple devices.
How to Set Up and Enable Single App Kiosk Mode

- Permanent adhesive for secure installation
- Removable with locking screws for theft prevention
- Cables hidden through nearby conduits
- Optional vinyl cling for clean aesthetics
[VIEW MORE FEATURES]

- Easy installation with suction cups
- Quick removal for portable setups
- Cables neatly managed for temporary use
- Optional vinyl cling for internal concealment
[VIEW MORE FEATURES]

- Adjustable tilt for better viewing angles
- Temporary suction cup mounting for flexibility
- Efficient wire routing with tilt functionality
- Optional vinyl cling for a sleek appearance
[VIEW MORE FEATURES]
To set up and enable Single App Mode, the following Kiosk Mode prerequisites must be met:
First, the iPad must be supervised, which typically requires an Apple Configurator or a Mobile Device Management (MDM) solution.
Also, an MDM solution is often required to remotely configure and manage Single App Mode settings. This allows administrators to deploy the mode efficiently across multiple devices.
Once you meet these iPad Kiosk Mode prerequisites, you can set up and enable Single App mode for your mobile devices by following the following steps.
Step 1: Preparing the iPad
Ensure the iPad is running the latest version of the Apple operating system. Verify and update this through the Settings app under General > Software Update.Confirm that the desired app is installed and functioning correctly on your device.
Step 2: Accessing the Settings
Open the Settings app on the iPad.Navigate to General > Accessibility > Guided Access. Although Single App Mode is distinct from Guided Access, enabling Guided Access is a prerequisite for configuring Single App Mode.
Step 3: Enabling Guided Access
Toggle the Guided Access switch to the "On" position.Set a passcode by selecting Passcode Settings. This passcode will be required to exit Single App Mode.
Step 4: Configuring Single App Mode via Apple Configurator
Download and install Apple Configurator 2 on a Mac computer from the Mac App Store.Connect the iPad to the Mac using a USB cable.
Launch Apple Configurator 2 and select the connected iPad from the device list.
Step 5: Setting Up Single App Mode
In Apple Configurator 2, click the "Actions" menu and select "Advanced."Choose "Start Single App Mode" from the dropdown menu. A list of installed applications will appear. Select the application you wish to run in Single App Mode. Click "Select App" to confirm your choice.
Step 6: Deploying the Configuration
Apple Configurator 2 will push the Single App Mode configuration to the iPad.The iPad automatically locks into the selected application, restricting access to other apps and system functions.
Step 7: Verifying the Configuration
Ensure the iPad is operating exclusively within the chosen application.Test the functionality to confirm that the device is locked into Single App Mode and that users cannot exit the application without the passcode.
Single App Mode is now set up, making your device secure for commercial and institutional purposes.
What to Do if Guided Access is Not Working
When Guided Access is not functioning as expected,diagnosing and addressing the issue systematically is essential.Below are the steps and considerations to ensure Guided Access operates correctly:
Step 1: Verifying Settings Configuration
Ensure that Guided Access is enabled in the iPad's settings. Navigate to Settings > Accessibility > Guided Access and confirm the toggle switch is turned on.Check that the passcode settings are correctly configured. This can be done by selecting Passcode Settings within the Guided Access menu and verifying the passcode or biometric settings.


